How to Structure Drone Imagery by Property, Site, and Date
Why Organization Matters for Drone Imagery
Drone flights produce large volumes of visual data. Without a clear filing system, locating a specific image from a particular property on a given date becomes tedious. An aerial imagery platform can simplify this process, but only if you set up a logical structure from the start. This article walks through the practical steps to organize drone imagery by property, site, and date, so you can find what you need quickly and avoid confusion.
Step 1: Define Your Hierarchy Before the First Flight
The most important step happens before you even launch the drone. Decide on a consistent hierarchy that reflects how you will later search for the data. A common structure is Property > Site > Date. For example, a single property might contain several sites such as a building, a parking lot, and a landscaped area. Each site then holds imagery from multiple flights, organized by date. Sketch this hierarchy on paper or in a spreadsheet. Share it with anyone who will fly or upload images. Consistency across the whole team prevents mismatched folder names and orphan files.
What to watch for: Avoid mixing different naming conventions. If one person uses "2025-03-15" and another uses "15Mar2025", searching becomes unreliable. Agree on a date format (ISO 8601, YYYY-MM-DD, is a good choice because it sorts chronologically by default) and a property naming standard, such as full address or a short code.
Step 2: Use Folder Naming Conventions That Sort Naturally
Once the hierarchy is clear, apply it to folder names. A typical folder path might look like: PropertyName/SiteName/YYYY-MM-DD/. This structure allows any file browser or aerial imagery platform to display items in a logical order. Avoid using special characters such as slashes, colons, or question marks in folder names, as they can cause errors on different operating systems. Stick to letters, numbers, hyphens, and underscores.

What to watch for: Long folder names can become cumbersome. Keep property and site names short but recognizable. An abbreviation like "JW-PROP" for a property called "Johnson Warehouse" works if the team knows the code. Document the abbreviations in a simple reference file stored at the top level of your archive.
Step 3: Standardize File Naming Within Each Folder
Inside the date folder, each image or video file needs a name that carries useful metadata. A good pattern is: YYYY-MM-DD_PropertyCode_SiteCode_Angle_Index.ext. For instance, 2025-03-15_JW_Lot_Nadir_001.jpg. This tells you the date, property, site, camera angle, and sequence number without opening the file. If the aerial imagery platform you use supports geotags or flight logs, include those as well, but the file name remains the most durable identifier when files are moved or copied.
What to watch for: Avoid vague words like "photo1" or "droneimage". They add no value and create duplicates. Also, be careful with versioning. If you process the image later (e.g., orthomosaic or thermal map), add a suffix such as "_processed" or "_rgb" rather than replacing the original. Keep originals untouched in a subfolder or mark them clearly.
Step 4: Leverage Metadata and Tags in Your Aerial Imagery Platform
Modern aerial imagery platforms can read and display embedded metadata such as GPS coordinates, altitude, camera settings, and flight timestamps. Uploading files with consistent metadata saves manual entry. After ingestion, use the platform's tagging or labeling features to add custom fields like "property", "site", "inspection type", or "issue detected". Tags allow you to filter across multiple properties and dates in one view. For example, you could filter for all images tagged "roof damage" from sites in a certain city, regardless of the date.
What to watch for: Metadata can be stripped during file conversion or transfer. Check that your workflow preserves EXIF and XMP data. Also, avoid over-tagging. A few well-chosen tags are more useful than dozens of inconsistent labels. Train the team on which tags to use and when.
Step 5: Create a Simple Index or Manifest
Even the best folder structure benefits from a lightweight index. A spreadsheet or text file at the top level of each property folder listing every site, the dates of each flight, and any notable observations (e.g., "thermal scan of east facade", "orthomosaic of entire property"). This manifest gives anyone a quick overview without drilling into every folder. It also serves as a backup if folder names ever get scrambled.
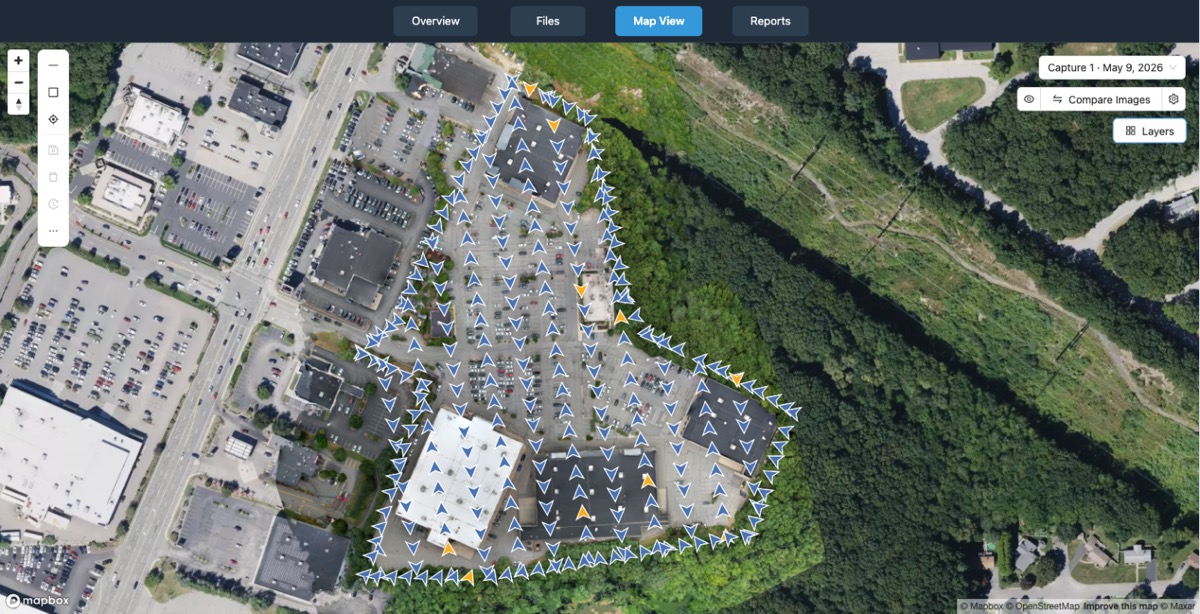
What to watch for: Keep the index simple. A complex database may become a maintenance burden. Update the index each time you add new imagery. If the team is small, a shared online document works. For larger operations, some aerial imagery platforms can auto-generate such a manifest from uploaded files, which saves time.
Step 6: Regularly Review and Prune Unnecessary Files
Storage costs add up, especially with high-resolution imagery and video. Schedule a periodic review, monthly or quarterly, to delete duplicate, blurry, or redundant files. Keep only the best angle of each shot and any processed deliverables that add value. Before deleting, confirm that you have backups of anything that might be needed later for compliance or client records.
What to watch for: Avoid deleting raw files too early. Some analysis, like comparing vegetation index over multiple seasons, requires the original unprocessed data. Set a retention policy: keep originals for a defined period (e.g., one year) and then archive them to cold storage. National Drone Services processed drone deliverables often include both raw and processed versions, so a clear retention policy helps manage both.
Step 7: Automate Where Possible
Manual organization is prone to errors. If your aerial imagery platform supports automation, use it. For example, set up rules that rename files on upload according to your naming convention, or auto-tag images based on flight path metadata. Some platforms can read the drone's flight log and extract the date and location to populate the folder path automatically. This reduces the chance of mistakes and speeds up the workflow, especially when handling many flights across different properties.
What to watch for: Automation only works reliably if the input data is correct. Check that the drone's clock and GPS are set properly before each flight. A wrong date or inaccurate coordinates will propagate errors through the entire system. Also, test automation rules on a small batch before applying them to a large archive.
Step 8: Train the Team and Document the Workflow
Even the best system fails if people don't follow it. Write a one-page guide covering your naming conventions, folder hierarchy, tagging rules, and retention policy. Include examples of correct and incorrect file names. Review the guide with anyone who flies the drone, uploads data, or processes imagery. Keep the document accessible in a shared location and update it when workflows change.
What to watch for: Avoid jargon in training materials. Use clear, simple language. New team members should be able to understand the system within a few minutes. Periodic refresher meetings help catch inconsistencies before they grow into a mess.
Keeping It Practical
Organizing drone imagery by property, site, and date is not complicated, but it demands discipline. The effort pays off when you need to locate a specific image for a client report or compare two flights of the same site months apart. National Drone Services processed drone deliverables follow a structured approach that makes retrieval straightforward, whether you are managing a single property or hundreds. Stick to a consistent hierarchy, use clear naming conventions, and let your aerial imagery platform handle the heavy lifting of sorting and filtering. With these steps, your drone data stays accessible and useful long after the flight is over.
National Drone Services on social media
 Facebook